


Hace tiempo que quiero hacer un libro para Sophia, a ella le encantan los libros con imagenes pero tienen que ser hechos de tela o cartón duro sino los rompe.
Entonces hice este libro; está hecho de tela e hice decoupage de alguna imagenes de servilletas de papel.
Agregue una tapa con velcro para cerrar el libro desde una tapa hacia la otra, y coloque una flor de tela derretida.
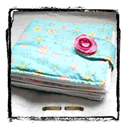
 Una tapa simple con una linda tela.
 La solapa con la flor de tela derretida.
Y aquí están las páginas...


Como hacerlo:
1. Corta rectángulos de tela, 2 rectángulos por cada pagina del libro (del tamaño que quieras).
2. Corta un rectángulo extra para la tapa (mismo tamaño que las paginas).
3. Corta imagenes de servilletas de papel.
4. Haz el decoupage de las imagenes como se explica aquí. Asegurate de que dejas un área libre para coser todas las páginas juntas, para esto dobla los rectángulos al medio (lados cortos juntos) y usa alfileres para marcar el centro mas 2 cm a cada lado.
5. Junta 2 de las páginas, lados derechos enfrentados. Si quieres agregar alguna tela para que quede mas suave hazlo aquí.
6. Cose alrededor del borde dejando una abertura de unos 5 cm en uno de los lados.
7. Da vuelta las páginas hacia afuera.
8. Haz una costura por el borde (alrededor de 0.4 cm desde el borde).
Para la solapa
1. Junta 2 pequeños rectángulos de tela, lados derechos enfrentados, puedes redondear uno de los lados.
2. Cose alrededor del borde excepto por uno de los lados cortos or el lado no redondeado.
3. Plancha bien y cose por encima alrededor de los bordes.
4. Cose una pequeña pieza de velcro del lado de adentro del extremo redondeado de la solapa.
Para la tapa
1. Toma el rectángulo para la tapa, coloca la solapa sobre el lado derecho de la tapa posterior, alinea el borde no redondeado de la solapa con el borde de la tapa. Coser juntos.
2. Coser una pieza de velcro en el derecho del lado de arriba de la tapa.
3. Toma la primera página del libro y la tapa juntas, lados derechos enfrentados. Asegurate que la solapa queda en medio de ambas.
4. Coser como se explica para las paginas del libro, incluyendo la costura por encima.
Coloca todo junto
1. Toma la tapa primero, lado de afuera hacia abajo, entonces coloca las páginas una sobre la otra.
2. Coser 2 filas de costura desde arriba hacia abajo.
Listo!
I have been wanting to make some soft book for Sophia, she loves books but they have to be made of cloth or hard cardboard so she won't break it.
So I came up with this book; It is all made with fabric and I made decoupaged some pictures from paper napkins.
I added a flap with velcro to close the book from one cover to the other, and put a flower made of melded fabric.
A simple cover with a cute fabric.The flap with the fabric melted flower.And here you have the pages...
How to make it:
1. Cut rectangles of fabric, 2 rectangles for each page of your book (you choose the size).
2. Cut one extra rectangle for the cover (same size of the pages).
3. Cut some images from paper napkins.
4. Decoupage the images as explained here. Make sure you leave a free area to sew all the pages together, to do this fold the rectangles in half (short sides together) and use pins to mark the middle plus 2 cm to each side.
5. Take 2 of the pages together, right sides facing.
6. Sew all around the edges but leave a 2.5 inches opening on one side.
7. Turn the page right side out.
8. Top stitch all around the edges (about 1/6" from the edge).
For the flap
1. Take 2 small rectangles of fabric, right side together, you can cut a rounded shape on one of the sides.
2. Sew all around the edge except one of the short side or the not rounded one.
3. Iron and top stick all round the edges.
4. Sew a small piece of velcro on inner side of the rounded end of the flap.
For the cover
1. Take the rectangle for the cover, place the flap over the right side of the back side of the cover, align the not rounded edge of the flap with the edge of the cover. Sew it.
2. Sew a piece of velcro on the other side of the cover, on the side that would be the top side.
3. Take the first page of the book and the cover together, right sides facing. Make sure the flap is in between both fabrics.
4. Sew as explained for the pages of the book, including the top stitching.
Put all together
1. Take the cover first, outside down, then place the pages one on the top of the other.
2. Sew 2 row of stitches from top to bottom.
Done!
Desde algum tempo atrás eu quero fazer um livro para Sophia, ela adora livros com imagens, mas eles devem ser feitos de tecido ou papelao duro para ela nao quebrar.
Entao eu fiz este livro; é feito de tecido e fiz decoupagem de algumas imagens de guardanapo de papel.
Adicioné uma aba com velcro para fechar o livro de uma capa a outra, e coloque uma flor de tecido derretido.
Una tapa simple con una linda tela.La solapa con la flor de tela derretida.Y qeuí están las páginas...
How to make it:
1. Cut rectangles of fabric, 2 rectangles for each page of your book (you choose the size).
2. Cut one extra rectangle for the cover (same size of the pages).
3. Cut some images from paper napkins.
4. Decoupage the images as explained here. Make sure you leave a free area to sew all the pages together, to do this fold the rectangles in half (short sides together) and use pins to mark the middle plus 2 cm to each side.
5. Take 2 of the pages together, right sides facing.
6. Sew all around the edges but leave a 2.5 inches opening on one side.
7. Turn the page right side out.
8. Top stitch all around the edges (about 1/6" from the edge).
For the flap
1. Take 2 small rectangles of fabric, right side together, you can cut a rounded shape on one of the sides.
2. Sew all around the edge except one of the short side or the not rounded one.
3. Iron and top stick all round the edges.
4. Sew a small piece of velcro on inner side of the rounded end of the flap.
For the cover
1. Take the rectangle for the cover, place the flap over the right side of the back side of the cover, align the not rounded edge of the flap with the edge of the cover. Sew it.
2. Sew a piece of velcro on the other side of the cover, on the side that would be the top side.
3. Take the first page of the book and the cover together, right sides facing. Make sure the flap is in between both fabrics.
4. Sew as explained for the pages of the book, including the top stitching.
Put all together
1. Take the cover first, outside down, then place the pages one on the top of the other.
2. Sew 2 row of stitches from top to bottom.
Done!


2 comentarios:
Hola Ceclia, qué lindo y original! Me encantó!
Besos,
Sandra
Hola ! me encanto tu pagina y que compartas las ideas con todas al igual que tu me encanta hacer yo misma las cosas para mi peque y busco ideas asi que gracias por compartirlo !!! Saludos
Norma Alvarado
Publicar un comentario