


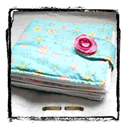


After the first day of Sophia at school with her new backpack, she came home with this tag:

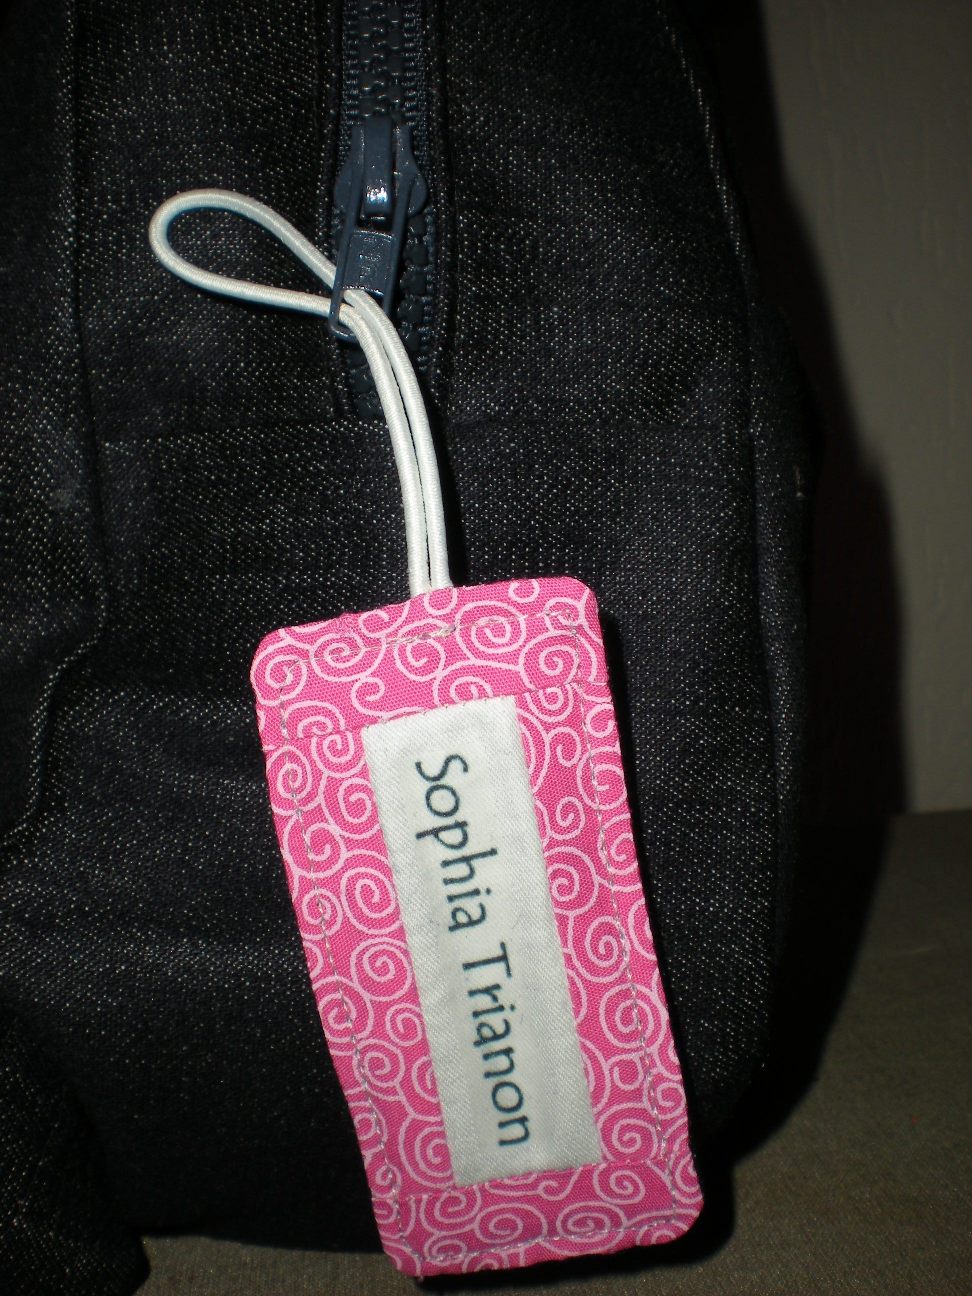
it didn't match at all with the new backpack, so I made a cloth tag with her name to hang from the zipper.

To make this tag you will need:
- 2 x 4 inches of denim
- 1.5 x 3 inches of white cotton
- 2 strips 1 x 3 inches of fabric for the borders (top and bottom)
- 2 strips 1 x 2.5 inches of fabric for the borders (left and right)
- the name of your child printed on transfer paper
- 6 inches of ribbon or cord
Instructions:
1. Take the rectangle of white cotton right side up.
 2. Place the piece of transfer paper over the white cotton printed side down.
3. Use a warm-hot iron to transfer the name to the fabric.
 4. Wait until the fabric is cold, then remove the paper part from the transfer paper.

5. I forgot to take this picture. Place the long stripes over the long edges of the white cotton, right sides facing, align the stripes over the top and bottom edges. Sew along the edges.

6. Then place the short stripes over the short sides, right sides facing, align over the left and right edges and sew.

7. Press seams, be careful not to apply heat directly on the transfer paper.

8. Take a piece of ribbon or cord, fold it in half and sew the ends to the left edge.
 9. Take the piece of denim and the rest of the tag together, right sides facing. Sew along the edge leaving an opening on the right side.

10. Clip the corners and turn right side out. Then sew all around the edge. Press seams.

11. Now you can place the tag on the zipper.


it didn't match at all with the new backpack, so I made a cloth tag with her name to hang from the zipper.

To make this tag you will need:
- 2 x 4 inches of denim
- 1.5 x 3 inches of white cotton
- 2 strips 1 x 3 inches of fabric for the borders (top and bottom)
- 2 strips 1 x 2.5 inches of fabric for the borders (left and right)
- the name of your child printed on transfer paper
- 6 inches of ribbon or cord
Instructions:
1. Take the rectangle of white cotton right side up.
 2. Place the piece of transfer paper over the white cotton printed side down.
3. Use a warm-hot iron to transfer the name to the fabric.
 4. Wait until the fabric is cold, then remove the paper part from the transfer paper.
5. I forgot to take this picture. Place the long stripes over the long edges of the white cotton, right sides facing, align the stripes over the top and bottom edges. Sew along the edges.

6. Then place the short stripes over the short sides, right sides facing, align over the left and right edges and sew.

7. Press seams, be careful not to apply heat directly on the transfer paper.

8. Take a piece of ribbon or cord, fold it in half and sew the ends to the left edge.
 9. Take the piece of denim and the rest of the tag together, right sides facing. Sew along the edge leaving an opening on the right side.
10. Clip the corners and turn right side out. Then sew all around the edge. Press seams.

11. Now you can place the tag on the zipper.
Luego del primer día de Sophia con su nueva mochila, volvió a casa con esta etiqueta:
eso no hacía juego para nada con su nueva mochila, entonces hice una etiqueta de tela para colgar del cierre.
Para hacer esta tarjeta precisas:
- 6 x 10 cm de jean
- 4 x 7.5 cm tela de algodon blanca
- 2 tiras 2.5 x 7.5 cm de tela para los bordes (arriba y abajo)
- 2 tiras 2.5 x 6.5 cm de tela para los bordes (izquierda y derecha)
- el nombre impreso en papel para tranferir
- 12 cm de cinta o cordón
Instrucciones:
1. Toma el rectangulo de algodón blanco con el lado derecho hacia arriba.
2. Coloca la pieza de papel para transferir sobre la tela blanca, con el lado impreso hacia abajo.
3. Aplica calor con una plancha tibia a caliente para transferir el nombre a la tela.
4. Espera a que la tela enfríe y retira el papel del papel de transferencia.
5. Olvidé tomar esta foto. Coloca las tiras mas largas sobre los lados mas largos de la tela blanca, lados derechos enfrentados, alinea las tiras una sobre el borde superior y la otra sobre el borde inferior. Cose a lo largo de los bordes.
6. Entonces coloca las tiras mas cortas sobre los lados cortos, lados derechos enfrentados, alinea sobre los bordes derecho e iquierdo y cose.
7. Plancha las costuras, ten cuidado de no aplicar calor directamente sobre el nombre.
8. Toma una pieza de cinta o cordón, doblalo al medio y cose los extremos juntos sobre el borde izquierdo.
9. Toma la pieza de jean con la pieza anterior juntas, lados derechos enfrentados y bordes alineados. Cose alrededor del borde dejando una abertura en el lado derecho.
10. Corta las esquinas y da vuelta la etiqueta hacia el derecho. Cose todo por el borde y plancha las costuras.
11. Y ahora puedes colocar la etiqueta en el cierre.
eso no hacía juego para nada con su nueva mochila, entonces hice una etiqueta de tela para colgar del cierre.
Para hacer esta tarjeta precisas:
- 6 x 10 cm de jean
- 4 x 7.5 cm tela de algodon blanca
- 2 tiras 2.5 x 7.5 cm de tela para los bordes (arriba y abajo)
- 2 tiras 2.5 x 6.5 cm de tela para los bordes (izquierda y derecha)
- el nombre impreso en papel para tranferir
- 12 cm de cinta o cordón
Instrucciones:
1. Toma el rectangulo de algodón blanco con el lado derecho hacia arriba.
2. Coloca la pieza de papel para transferir sobre la tela blanca, con el lado impreso hacia abajo.3. Aplica calor con una plancha tibia a caliente para transferir el nombre a la tela.
4. Espera a que la tela enfríe y retira el papel del papel de transferencia.5. Olvidé tomar esta foto. Coloca las tiras mas largas sobre los lados mas largos de la tela blanca, lados derechos enfrentados, alinea las tiras una sobre el borde superior y la otra sobre el borde inferior. Cose a lo largo de los bordes.
6. Entonces coloca las tiras mas cortas sobre los lados cortos, lados derechos enfrentados, alinea sobre los bordes derecho e iquierdo y cose.
7. Plancha las costuras, ten cuidado de no aplicar calor directamente sobre el nombre.
8. Toma una pieza de cinta o cordón, doblalo al medio y cose los extremos juntos sobre el borde izquierdo.
9. Toma la pieza de jean con la pieza anterior juntas, lados derechos enfrentados y bordes alineados. Cose alrededor del borde dejando una abertura en el lado derecho.10. Corta las esquinas y da vuelta la etiqueta hacia el derecho. Cose todo por el borde y plancha las costuras.
11. Y ahora puedes colocar la etiqueta en el cierre.


1 comentario:
wwwooowww soo cool i will definitely do that !!!
Publicar un comentario