


You will need:
- styrofoam balls
- scraps of fabric
- cutter or scissors
- regular thread
- pen
- ribbons and gold cord

How to make them
1. Take 1 styrofoam ball. Mark the point at the top and bottom. Circle the ball with the thread using the top and bottom points as a reference. Use a pen to mark the line.


2. Remove the thread and repeat the previous step to make 2 more lines around the ball. So that the ball is divided in 6 sections.


3. Using the cutter or scissors make a cut a slit (just a few millimeters deep) following the lines.

4. Cut the fabric as directed in the pattern (the size of the pieces of fabric will depend on the size of the ball so make sure you enlarge or shrink the pattern as you need)

5. Use the dull knife to press the edges of the fabric into the ball.
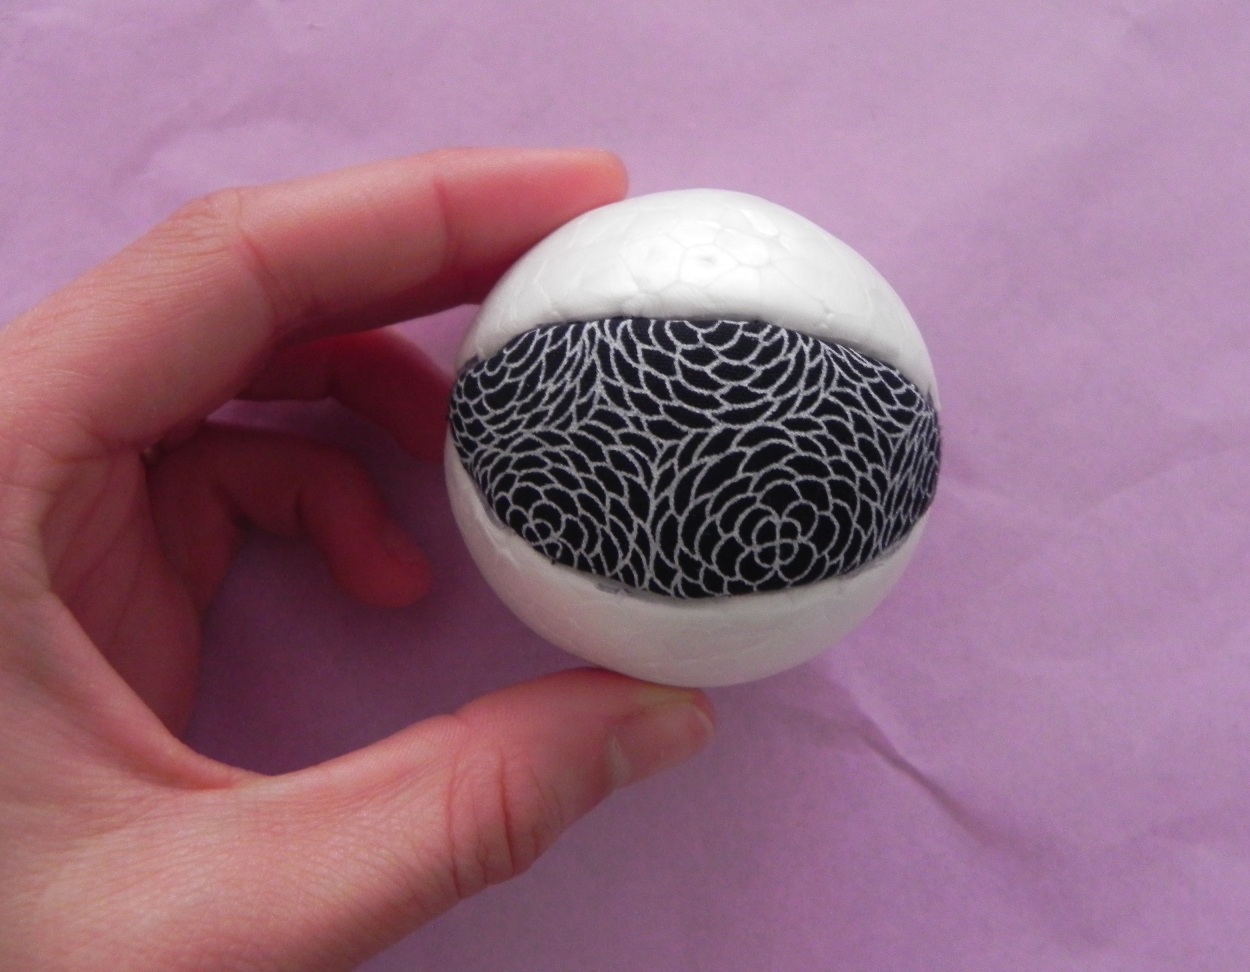
6. Add the rest of the piece until complete the ball.

7. Take a piece of ribbon (long enough to circle the ball 3 times). Fold the ribbon in half and mark the middle point. Hot glue the middle of the ribbon to the bottom of the ball. Circle the ball with the ribbon to cover one slit.

8. When you reach the top, turn the ball and repeat the process to the next slit.

9. When you reach the bottom, turn the ball again and cover the last slit.

10. When you reach the top cut the excess of ribbon and hot glue to fix in place.

11. Add a gold cord to hang. You can sew it or slip it under the ribbon before you hot glue it to the top of the ball.

You can use whatever you like to cover the slits, in the example next I've used a single ribbon, two ribbons together and a ribbon with a gold cord.

Pattern:
You can use this pattern to cut the pieces of fabric.
Read before use:
- This pattern only works if you divide the ball into 6 sections.
- You may need to enlarge or shrink the pattern depending on the size of the stylofoam ball.
- Before you cut the fabric; I recommend you to check that the size and shape is correct for the sections in the ball you chose.


18 comentarios:
Hi! Nice blog!
I am a new follower, I would love it if you could follow me back!
Six in the Nest
Hi! I'm a new follower via Google Friend Connect. :) Found you through the Blog Hop! :) Beautiful Idea! Love the fabric choices. Hopefully you can stop by! I have some great giveaways for $100 Target Gift Card and a "Sonic Colors" Wii Game :)
-Ai Mei
StudentSavingBucks
Hi, I'm a new follower from the Monday Blog Hop.
Your ornament is really pretty. Thanks for sharing.
Michele,
http://kidswonderart.blogspot.com
Love it! I'm definitely gonna to make one! New follower...check me out at www.loveluciblog.blogspot.com
what a great idea!! thanks for the tutorial!
New follower here too :-) You can check out my blog at: http://blackpurlsknitpickings.blogspot.com
WOW WOW This is a great tutorial ! I am you newest follower for sure !
Come say hi and follow me back !
XO
Came by your blog through bouffe e bambini. I'm your newest follower! The ornaments look great!
This is me: http://www.mustardcut.blogspot.com stop by if you have a chance :)
LOVE THIS PROJECT.
THE BEST PART IS THAT THEY ARE CUTE ENOUGH TO BE HOME DECOR AS WELL.
GREAT POST!
www.greensubmarinediydesign.blogspot.com
wow, I like that idea. Very creative. thanks for sharing the tutorial.
I am your new follower. You can follow me back at http://showmemama.com. Make sure you leave a comment so I know you visited.
I am your new follower. Would love for you to follow back!
These are beautiful, you make it look easy!
I'm a new follower
Would love for you to hop on over to my blog
Copper Llama Studio
http://copperllamastudio.blogspot.com/
Hi there, super cute tutorial! I am a new follower and bouffe e bambini sent me. :)
What a great tutorial! I'm bookmarking it so that I can make them. Super idea!
Gracias por el tutorial, las esferas quedan muy lindas. Saludos desde México.
Houa ! Superbe !
I LOVE THESE, GREAT IDEA.
I am now follwing you from the Souper Sat hop
This project is great, thanks for posting it and participating in the FaveCrafts blog hop! Our next blog hop will be January 15 and we hope you’ll participate again. Your project will also be featured in a special newsletter that goes out to 850,000+ readers. Thanks again!
Julia
Editor
FaveCrafts.com
hermosas felicitaciones
Publicar un comentario