


Explicaciones paso a paso de como hacer un Teñido anudado usando ColorEvolution, una tinta que se aplica en frío y quedan unos colores vivos muy lindos!

Materiales:
- tela
- ligas de goma
- tinta/s ColorEvolution
- tijeras
- bolsa de nylon
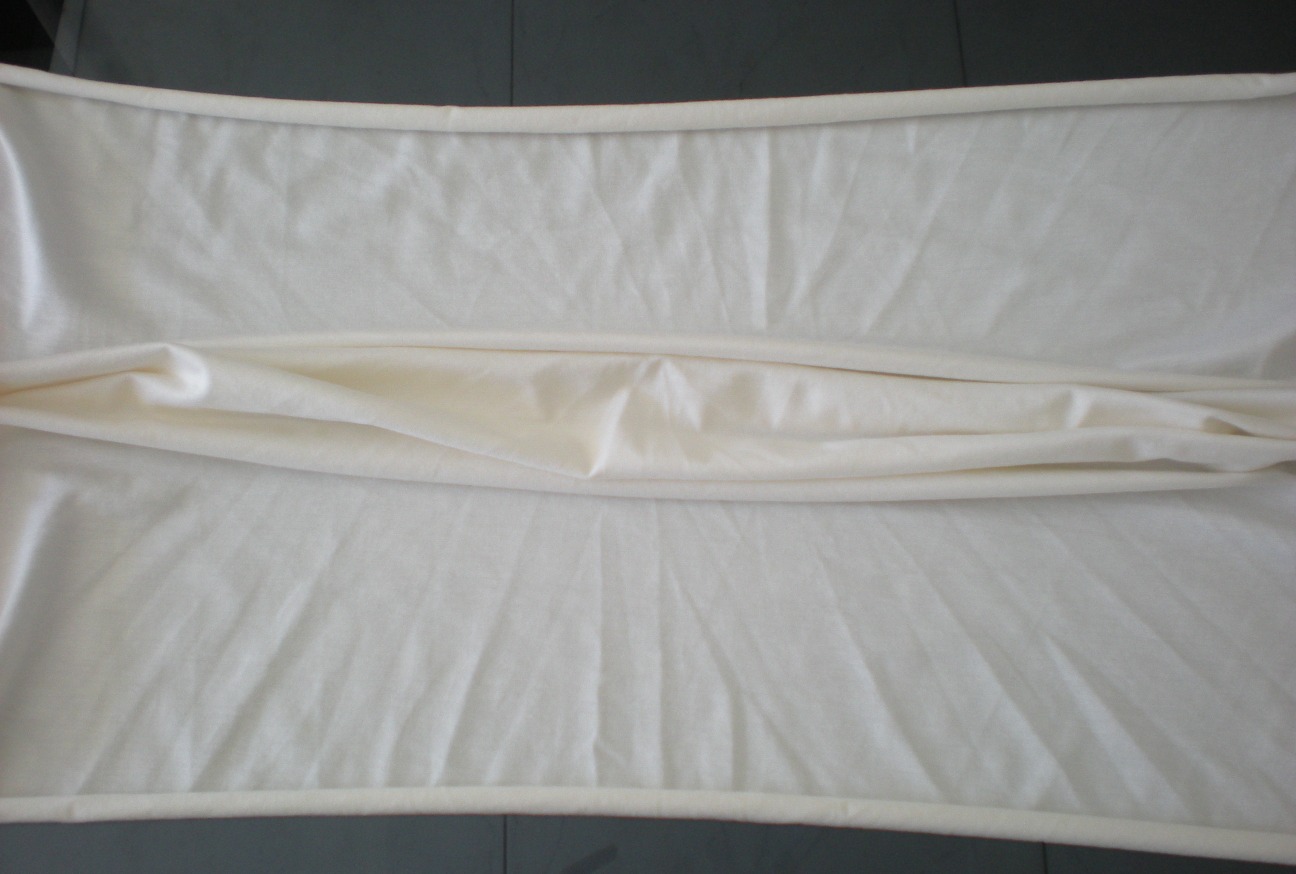
1. Arrugar la tela por la parte más angosta...

... hasta obtener algo así.

2- Doblar la tela arrugada en 3 partes iguales


3- Atar con ligas de goma o cordones.

4- Preparar la tinta llenando de agua el recipiente con el polvo que trae la caja ColorEvolution. Agitar bien hasta disolver todo el polvo.
En mi caso como tenía poca tela para teñir usé solo la mitad del polvo con la mitad de agua. Una vez que mezclas el polvo con el agua, solo tienes 45 minutos para usarlo, así que mejor solo mexclar la cantidad que vas a necesitar.

5- Mojar bien la tela y escurrir el exceso de agua.

6- Cortar la punta del pico aplicador de los recipientes con la tinta.
Atención: de aquí en adelante usar guantes! O quedarán con las manos coloridas por unos días.

7- Colocar la tela en un recipiente y comenzar a aplicar la tinta...
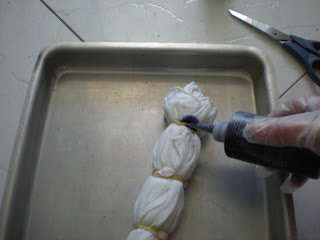
... hasta obtener algo así. Yo dejé algunas partes en blanco pero se puede aplicar más tinta para teñir más aún, solo hay que tener cuidado con la mezcla de los colores.

8- Colocar la tela ya tenida en una bolsa de nylon y llevar al microondas por 1 minuto. Retirar del microondas y dejar por 6 horas (o más) dentro de la bolsa.

9- Sacar de la bolsa, cortar las ligas de goma y secar al aire y a la sombra.
10- Y aquí el resultado!


Materiales:
- tela
- ligas de goma
- tinta/s ColorEvolution
- tijeras
- bolsa de nylon
1. Arrugar la tela por la parte más angosta...
... hasta obtener algo así.

2- Doblar la tela arrugada en 3 partes iguales


3- Atar con ligas de goma o cordones.

4- Preparar la tinta llenando de agua el recipiente con el polvo que trae la caja ColorEvolution. Agitar bien hasta disolver todo el polvo.
En mi caso como tenía poca tela para teñir usé solo la mitad del polvo con la mitad de agua. Una vez que mezclas el polvo con el agua, solo tienes 45 minutos para usarlo, así que mejor solo mexclar la cantidad que vas a necesitar.

5- Mojar bien la tela y escurrir el exceso de agua.

6- Cortar la punta del pico aplicador de los recipientes con la tinta.
Atención: de aquí en adelante usar guantes! O quedarán con las manos coloridas por unos días.

7- Colocar la tela en un recipiente y comenzar a aplicar la tinta...

... hasta obtener algo así. Yo dejé algunas partes en blanco pero se puede aplicar más tinta para teñir más aún, solo hay que tener cuidado con la mezcla de los colores.

8- Colocar la tela ya tenida en una bolsa de nylon y llevar al microondas por 1 minuto. Retirar del microondas y dejar por 6 horas (o más) dentro de la bolsa.

9- Sacar de la bolsa, cortar las ligas de goma y secar al aire y a la sombra.
10- Y aquí el resultado!

Explanations step by step about how to do a tie dyeing with ColorEvolution, this is a dye that you can apply cold and you get beautiful colors!
Materials:
- fabric
- rubber bands
- dye/s ColorEvolution
- scissors
- plastic bag
1. Gather the fabric from the shorter part...
... to get something like this.
2- Fold the gathered fabric in 3 equal parts.
3- Tie with rubber bands.
4- Prepare the dye by filling with water the bottle with the powder contained in the box of ColorEvolution. Shake to dissolve the powder.
In my case I had not to much fabric to dye that is why I used half of the powder with half of the water. Once you mix the powder with water you only have 45 minute to use it, so better mix just the amount of powder you need.
5- Soak the fabric in water and squeeze to remove the excess of water.
6- Cut the top of the bottle with the dye.
Attention: from here on use gloves! Or your hands will be very colorful for a few days.
7- Put the fabric into a container and start to apply the dye...
... until get something like this. I left some parts white but you can apply more dye to dye more, just take care with the mixture of the colors.
8- Put the fabric into a plastic bag and take it to the microwave for 1 minute. Take away from microwave and let it rest for 6 hours (or more) inside the bag to fix the color.
9- Take the fabric out of the bag, cut the rubber bands and let it dry naturally.
13- And here it id the result!
Explicações passo a passo de como fazer um tingido em nó usando ColorEvolution, uma tinta que se aplica em frio y deixa cores muito bonitas!
Materiais:
- tecido
- bandas elásticas
- tinta/s ColorEvolution
- tesoura
- sacola de náilon
1. Arrugar o tecido pela parte mais estreita...
... até obter algo assim.
2- Dobrar o tecido arrugado em 3 partes iguais
3- Atar com bandas elásticas.
4- Preparar a tinta enchendo de agua o recipiente com o pó que contem a caixa ColorEvolution. Agitar bem até dissolver todo o pó.
No meu caso como eu tinha pouco tecido para tingir só use a metade do pó com a metade de agua. Uma vez que você mistura o pó com a agua, solo tem 45 minutos para usa-lo, assim que melhor misturar a quantidade certa.
5- Molhar bem o tecido e escorrer o excesso da agua.
6- Cortar a ponta do bico aplicador dos recipientes com a tinta.
Atenção: de aqui em diante usar luvas! Ou as suas mãos vão ficar coloridas por alguns dias.
7- Colocar o tecido num recipiente e começar a aplicar a tinta...
... até obter algo assim. Eu deixei algumas partes em branco mas você pode aplicar mais tinta para tingir mais ainda, só tem que ter cuidado com a mistura dos cores.
8- Colocar o tecido já tingido numa sacola de náilon e levar ao microondas por 1 minuto. Tirar do microondas e deixar por 6 horas (ou mais) dentro da sacola.
9- Tirar da sacola, cortar as bandas elásticas e secar ao ar e à sombra.
10- E eis aqui o resultado!
.


No hay comentarios:
Publicar un comentario